Alloy wheels are a prized feature of many vehicles, enhancing both aesthetics and performance. However, the wear and tear of everyday driving, combined with the occasional encounter with potholes or curbs, can lead to unsightly damage. For some drivers, their car insurance may not cover the damage of the wheel, and repair will be the only option. Fortunately, with the right tools, materials, and a bit of elbow grease, repairing minor damage to alloy wheels is a task that can be tackled by DIY enthusiasts. In this guide, we’ll walk you through the step-by-step process of repairing and restoring your alloy wheels to their former glory.
How to Repair Alloy Wheels: Step by Step Guide
Assessing the Damage
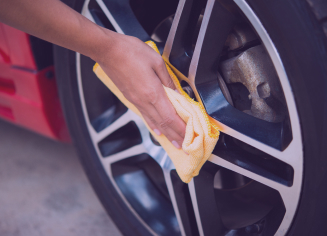
Before diving into repairs, it’s crucial to assess the extent of the damage. Common issues include curb rash, scratches, chips, and corrosion. Start by thoroughly cleaning the wheel to get a clear view of the damage. Once clean, inspect the wheel closely, noting any areas requiring attention. Minor scratches and chips can often be addressed with DIY repair kits, while more significant damage may require professional intervention.
Gathering Supplies
For DIY repairs, you’ll need a few essential supplies:
- Alloy Wheel Repair Kit: These kits typically include filler, primer, paint, and clear coat. Ensure you select a kit suitable for your wheel’s colour and finish.
- Sandpaper: Various grits will be needed, from coarse to fine, for sanding down imperfections.
- Masking Tape: Used to protect surrounding areas from overspray during painting.
- Degreaser: Essential for removing dirt, grease, and contaminants from the wheel surface.
- Cloths and Towels: For cleaning and drying the wheel.
- Safety Gear: Gloves and eye protection are essential when working with chemicals and abrasives.
Preparing the Wheel
Begin by thoroughly cleaning the wheel with a degreaser to remove any dirt, brake dust, or grime. Pay particular attention to the damaged areas. Once clean, allow the wheel to dry completely before proceeding. Next, use masking tape to protect the tyre and surrounding areas from accidental damage during the repair process.
Repairing Scratches and Chips
For minor scratches and chips, follow these steps:
- Sand the Area: Use fine-grit sandpaper to smooth out the damaged area. Be careful not to sand too aggressively, as this can create further damage.
- Apply Filler: Use the filler provided in your repair kit to fill in any remaining scratches or chips. Follow the manufacturer’s instructions for mixing and applying the filler, ensuring a smooth and even finish.
- Sand Again: Once the filler has dried, use fine-grit sandpaper to sand down the repaired area until it is flush with the rest of the wheel surface.
- Prime the Surface: Apply a thin coat of primer to the repaired area, following the instructions on the product packaging. This will help the paint adhere properly.
- Paint the Wheel: Using the paint provided in your repair kit, carefully apply several thin coats of paint to the repaired area, allowing each coat to dry fully before applying the next.
- Apply Clear Coat: Once the paint has dried, apply a clear coat to the entire wheel surface to protect the paint and provide a glossy finish.
Dealing with Corrosion
If your alloy wheels are suffering from corrosion, the repair process will be more involved. Here’s how to tackle corrosion:
- Remove the Corrosion: Start by sanding down the corroded areas using coarse-grit sandpaper until you reach bare metal. This will remove the corrosion and prepare the surface for repair.
- Apply Filler: Follow the same steps as repairing scratches and chips, applying filler to any areas where corrosion has caused damage to the wheel surface.
- Prime and Paint: Once the filler has dried, apply primer and paint to the repaired areas, following the same process as described earlier.
- Protect the Wheel: To prevent future corrosion, consider applying a wheel sealant or wax after the repair process is complete.
Final Touches
Once the repairs are complete, carefully remove the masking tape from the tyre and surrounding areas. Inspect the wheel closely to ensure the repairs have been successful and the finish is even and smooth. If necessary, apply additional coats of paint or clear coat to achieve the desired result.
Repairing Alloy Wheels: Extra Tips
Here are some bonus tips to enhance your alloy wheel repair process:
Preparation is Key: Take your time to thoroughly clean the wheel surface before starting any repairs. Remove all dirt, grime, and residue to ensure proper adhesion of filler, primer, and paint.
Practice Patience with Filler: When applying filler to scratches or chips, use multiple thin layers rather than one thick layer. This allows for better control and smoother results. Sand each layer lightly before applying the next to achieve a seamless finish.
Blend Paint Seamlessly: When painting the repaired area, feather the paint outward from the repair site to blend it seamlessly with the surrounding surface. This helps avoid obvious paint lines and ensures a uniform appearance.
Use Proper Technique for Clear Coat: Apply the clear coat in thin, even layers, following the manufacturer’s instructions for drying times between coats. Avoid heavy application, as this can lead to drips and uneven finish.
Protect Newly Repaired Wheels: After completing repairs, avoid driving on rough terrain or exposing the wheels to harsh chemicals or abrasive cleaners for at least 24 hours. This allows the paint and clear coat to fully cure and harden, ensuring durability.
Regular Maintenance: To prolong the lifespan of your repaired alloy wheels, practice regular maintenance such as cleaning them regularly with mild soap and water, avoiding harsh chemicals, and applying a protective wax or sealant periodically.
Seek Professional Help if Needed: If you’re unsure about tackling certain repairs or if the damage is extensive, don’t hesitate to seek help from a professional alloy wheel repair specialist. They have the expertise and tools to handle complex repairs effectively.
By incorporating these additional tips into your alloy wheel repair process, you can achieve professional-looking results and extend the longevity of your wheels.
Alloy Wheel Insurance: Mitigating Risk for Drivers
Beyond the realm of repairs, alloy wheel insurance can replace the requirement for DIY solutions and act as a safeguard against unforeseen damages. Through comparison websites like Insurance Cloud, UK car owners gain access to tailored policies designed to address the unique vulnerabilities of alloy wheels. These policies offer comprehensive protection against common hazards such as potholes, curbs, and road debris, ensuring peace of mind on every journey. Working with reputable insurers, Insurance Clouds insurers extend convenience and reliability, providing on-site repairs and financial relief for its users at the very best prices. By investing in alloy wheel insurance, car owners can navigate roads with confidence, knowing that their prized wheels are safeguarded against wear and tear.
Protecting your Alloy Wheels
Repairing alloy wheels is a rewarding DIY project that can save you money and restore the appearance of your vehicle. By following these steps and using the right materials, you can tackle common issues such as scratches, chips, and corrosion with confidence. Remember to take your time, follow safety precautions, and enjoy the process of bringing your alloy wheels back to life while safeguarding your investment for the road ahead.
Moreover, with the added protection of alloy wheel insurance, car owners can mitigate risk and ensure comprehensive coverage for their prized wheels.
Thinking about getting Alloy Wheel Insurance? Click the link to get a quote for Alloy Wheel Insurance via Insurance Cloud today.